Procedure to migrate Exchange Mailbox to PST
Know how to move Exchange Mailbox to Outlook Data File Format using this tool by below given pictures step by step.
Step 1
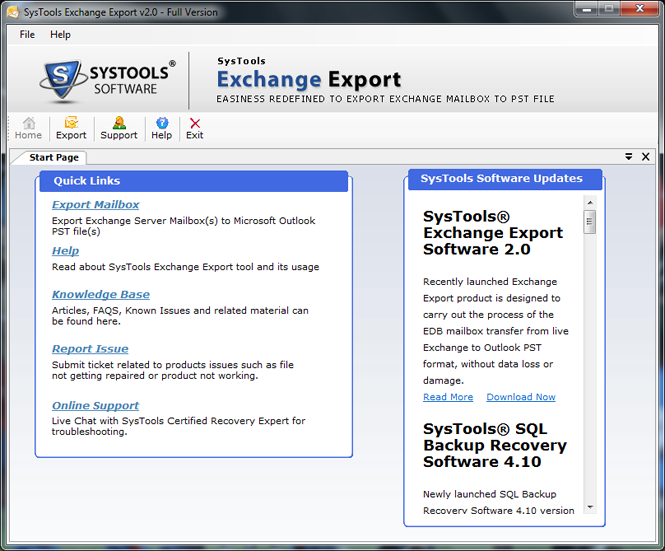
Install the software and Go to All Programs from start menu and click on Exchange Export.
Step 2
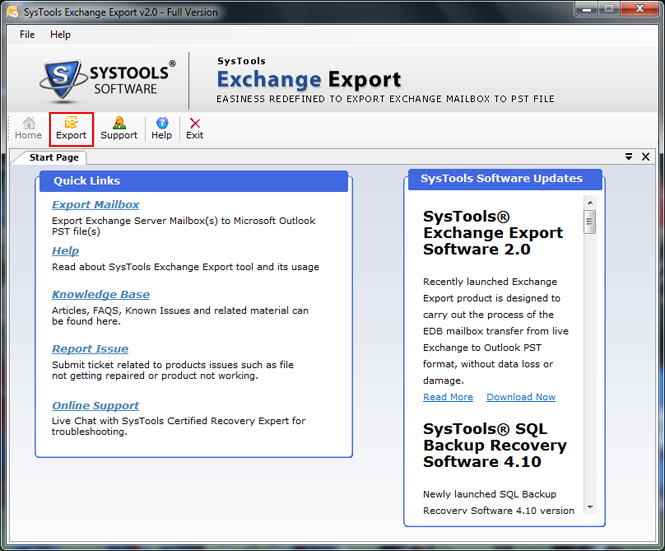
Click Export option from the top menu.
Step 3
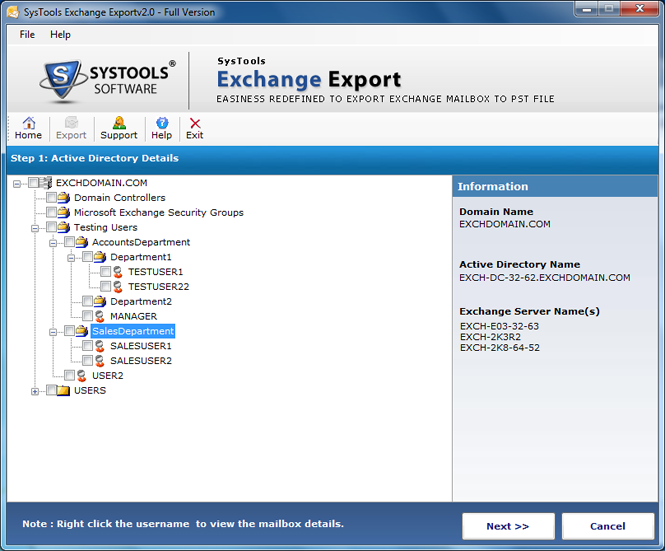
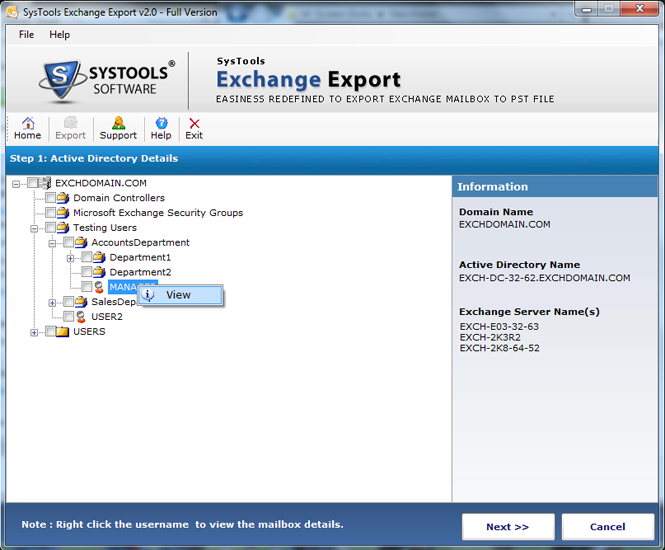
Clicking on Export shows the Active Directory details and Mailboxes. Select the Mailbox you want to Export and click Next.
Step 4
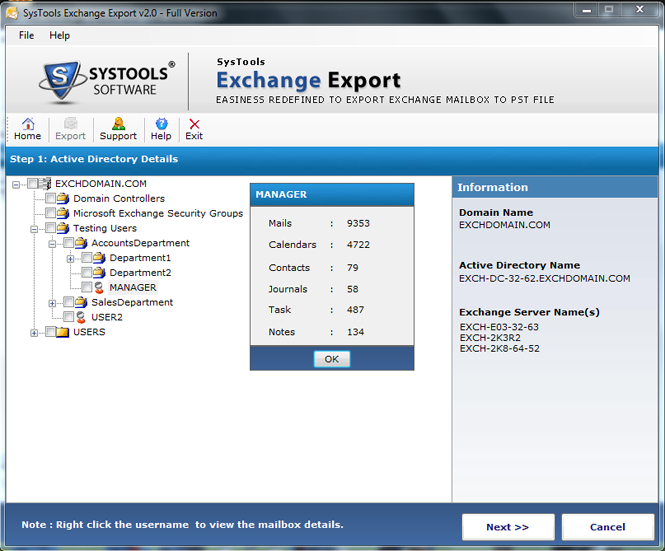
To view the Mailbox details, right click on the respective Mailbox and click on view. A screen appears which gives the details of Mailbox.
Step 5
It will show the no. of mails, contacts, calendar, task, journals in a selected Mailbox. Click on Next.
Step 6
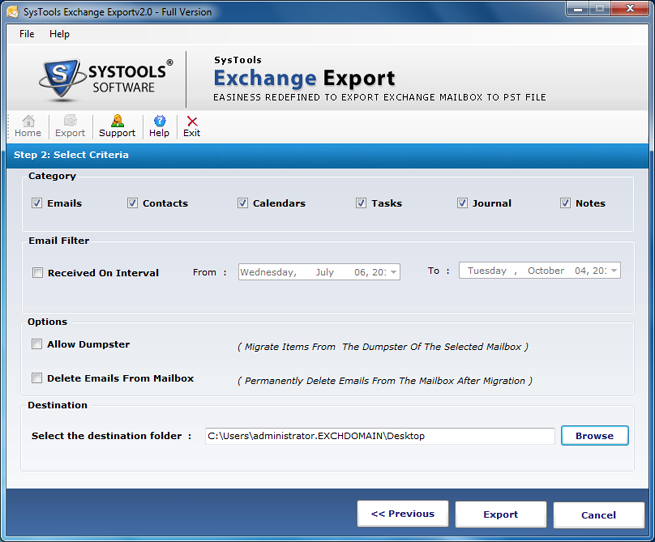
Next window appears will allow the user to categorize the items for export. Select the items like Mails, contacts, Tasks etc from category. In Emails option , tool provides email filter where you can set date-time interval.
Two more options are available i.e. Allow Dumpster and Delete Emails from Mailbox.
Step 7
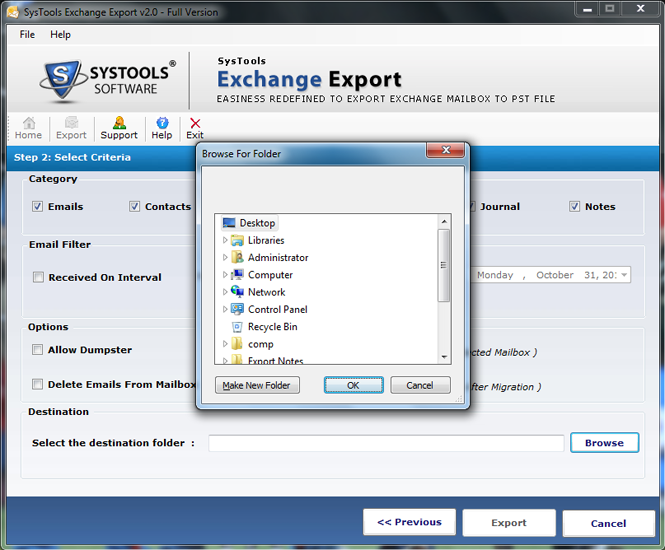
In Destination field browse the location for saving exported file and click on Export option.
Step 8
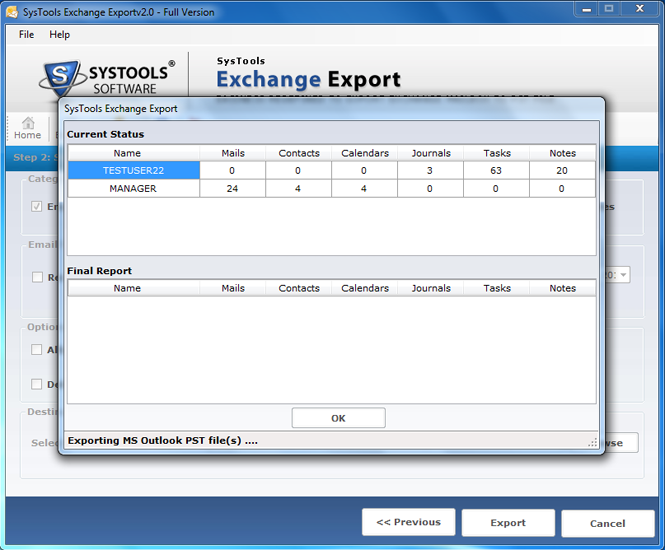
Next screen appears showing the current processing status of the mailbox with number of mails, contacts, calendars, tasks, journals and Notes. After completion a final Report is generated.
Step 9
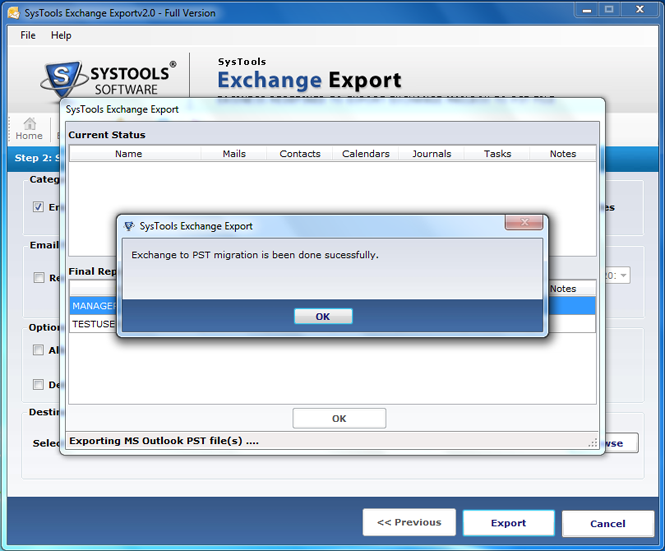
At the end of a process a message appears ‘Exchange to PST migration has been done successfully’. Hit Ok to end up.
