Carry out step by step execution by following Helpful Screenshots and be sure about safe Mail Migration.
Step 1
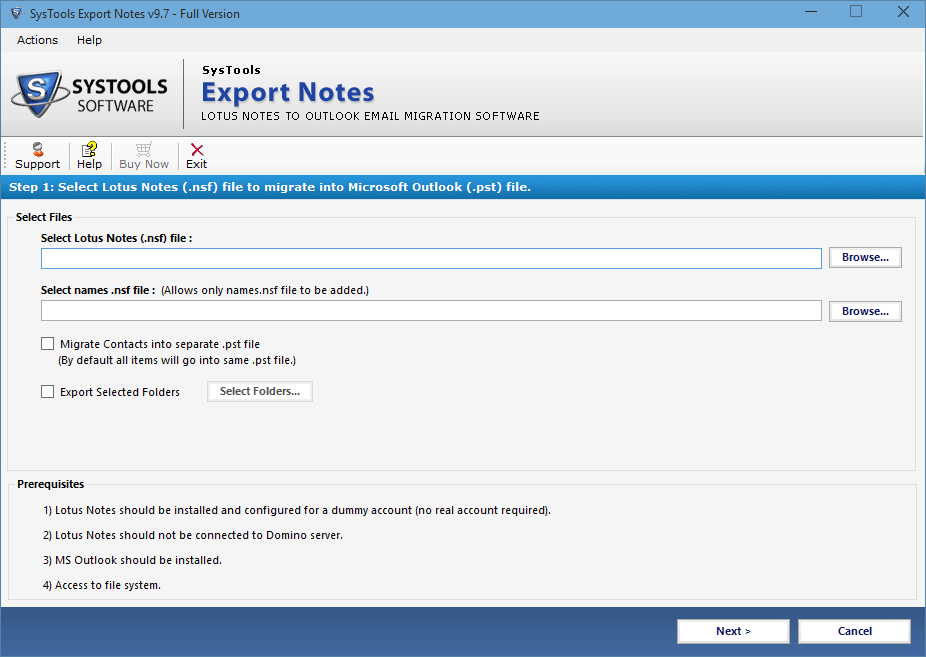
Install and Run the Software. The software will have following interface.
Step 2
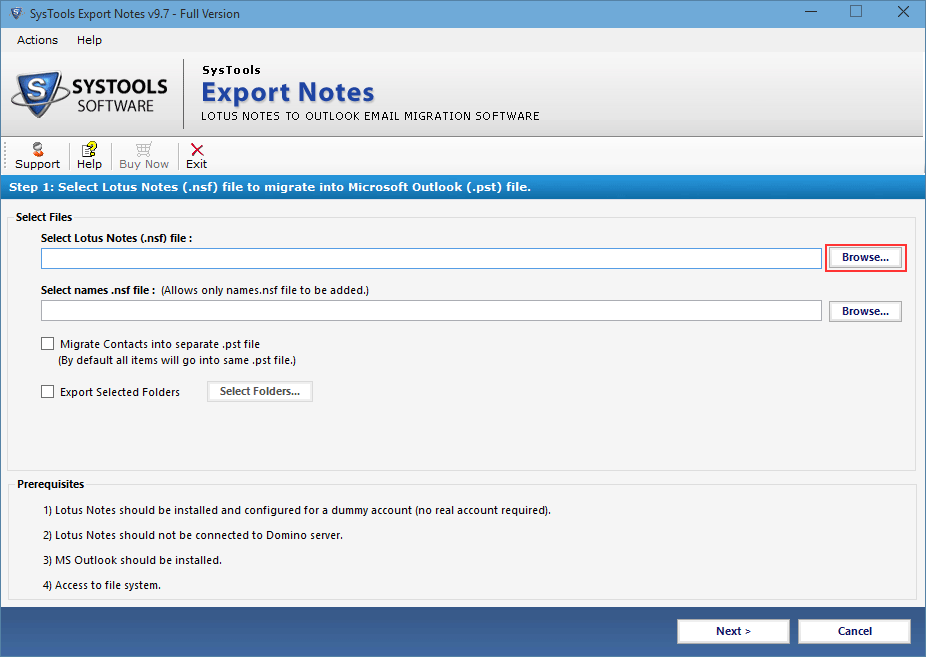
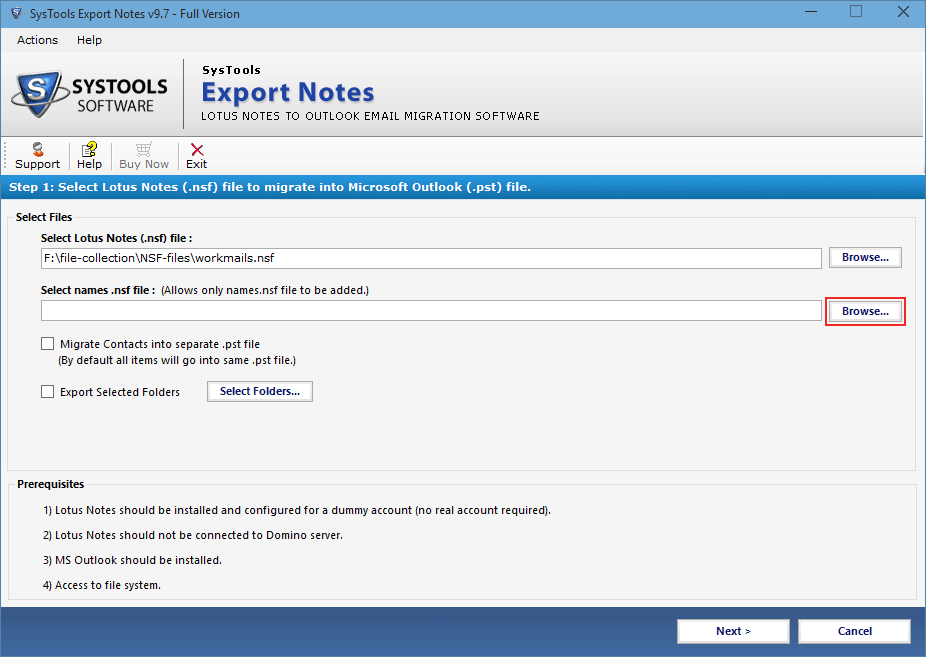
Browse the Lotus Notes .nsf file to add it on software to proceed it further.
Step 3
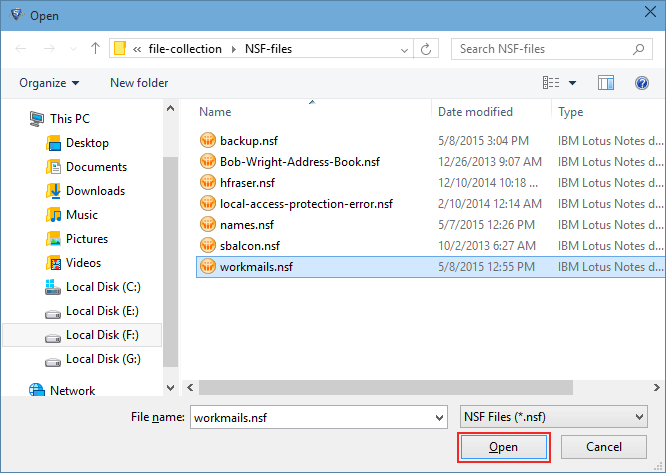
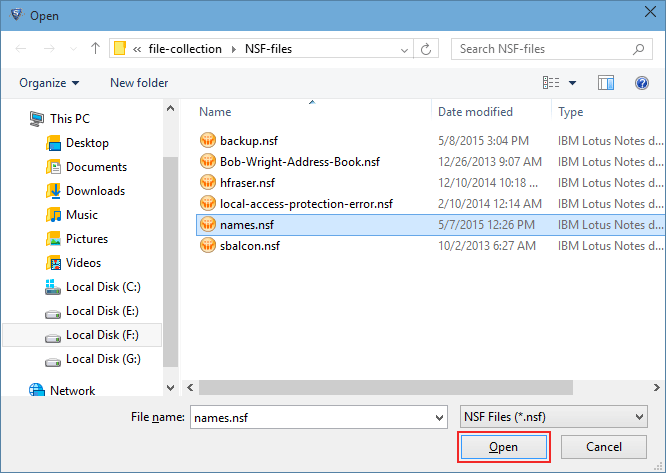
Choose your NSF file from the browsed location. Click on Open.
Step 4
Now locate the names.nsf file in your machine.
Step 5
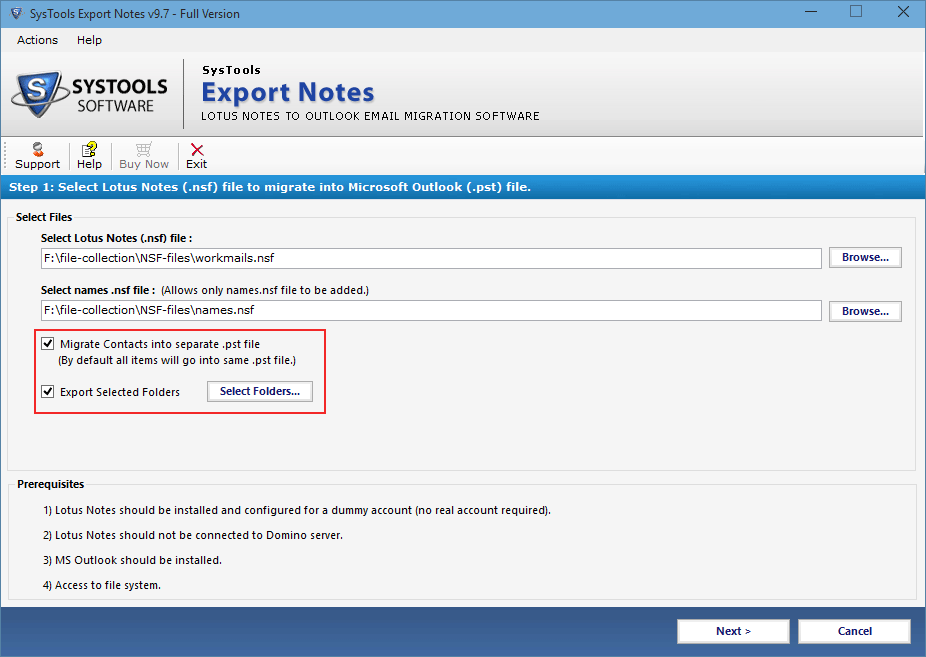
Choose the desired contact file of lotus notes from the machine. Click on Open.
Step 6
For migration of Lotus Notes Contacts into separate PST file, then select Migrate Contacts into separate .pst file
For exporting selected folder click on Export Selected Folder.
Step 7
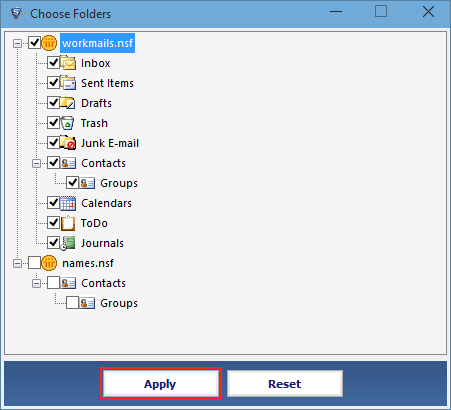
Choose the folder you need to export and click on Apply.
Step 8
After this various categories need to selected and you can also apply filters to each category.
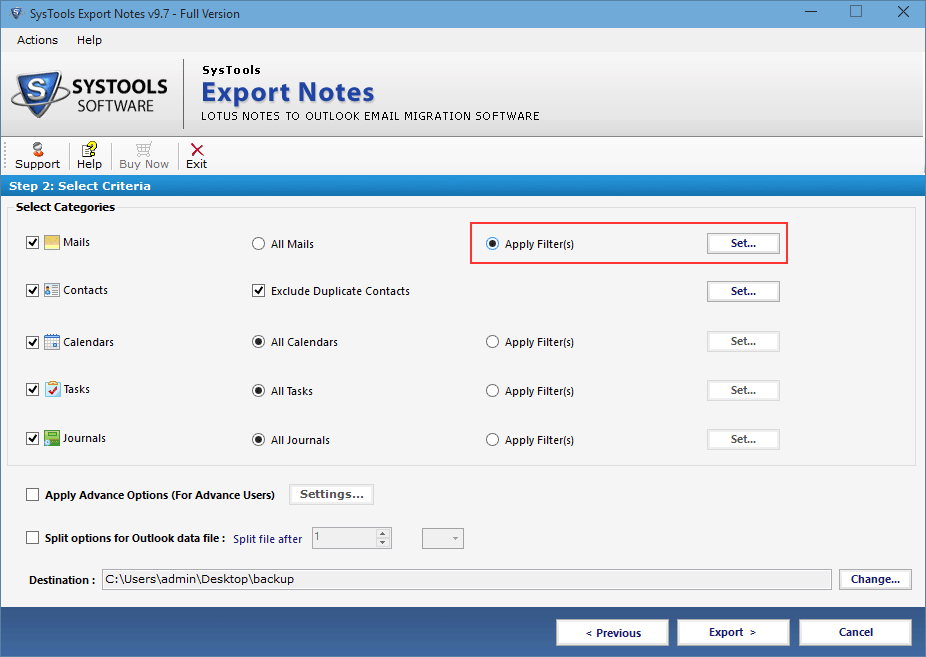
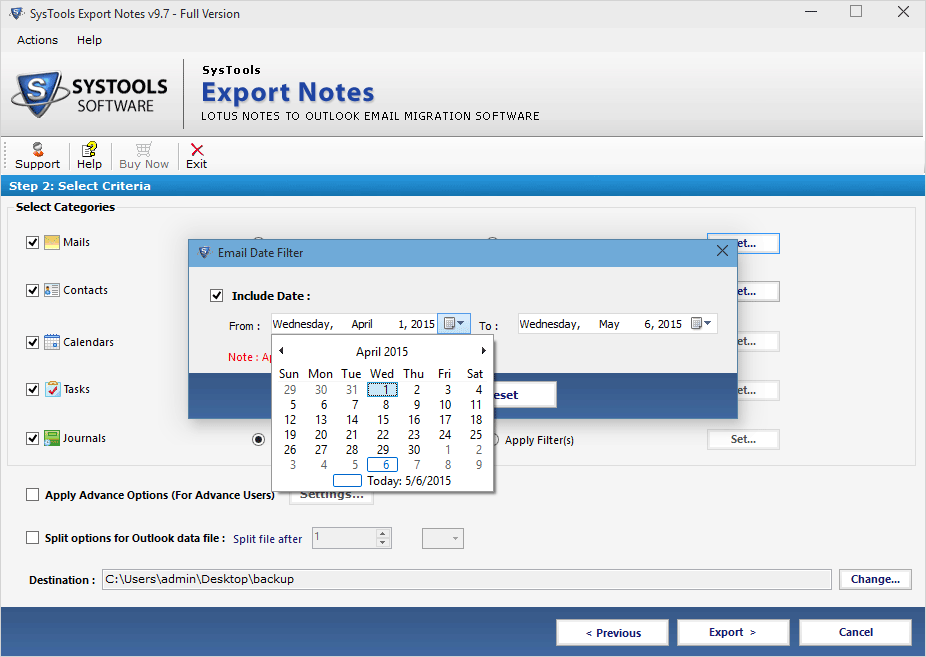
Step 9
In emails filter, include the date interval during which you want to migrate the mails.
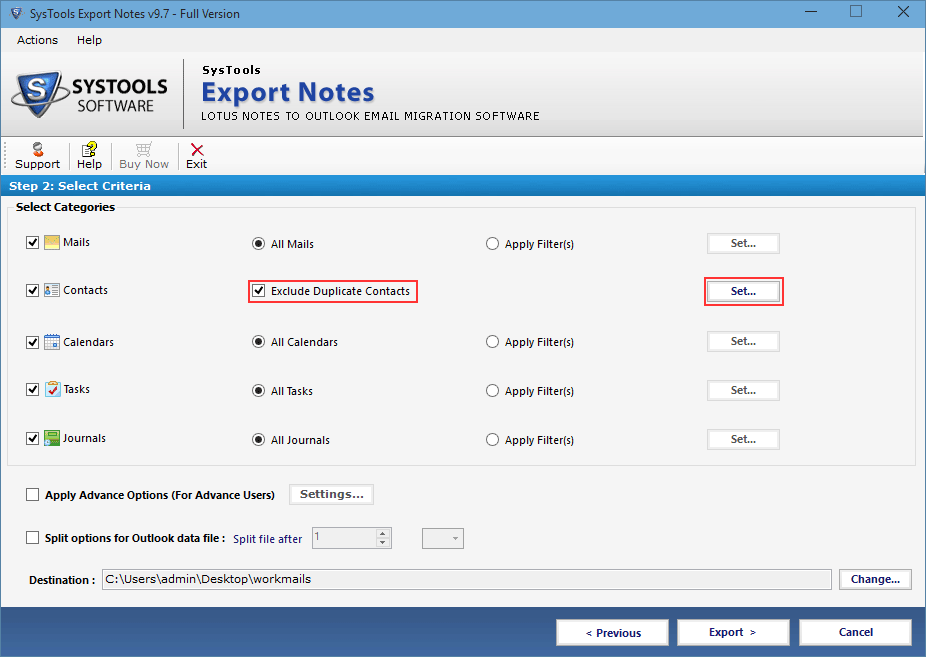
Step 10
Duplicate contacts can be removed by selecting the given option Exclude Duplicate Contacts and click on Set.
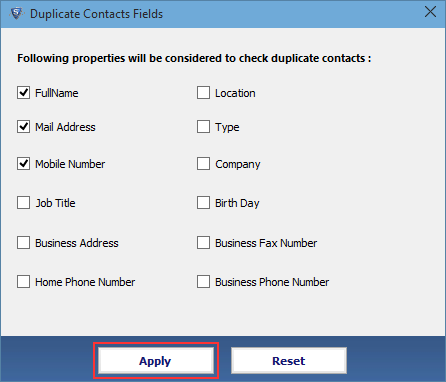
Step 11
All the properties of contacts will be shown, select the field for which you want to check duplicacy of contacts. Click on Apply button.
Step 12
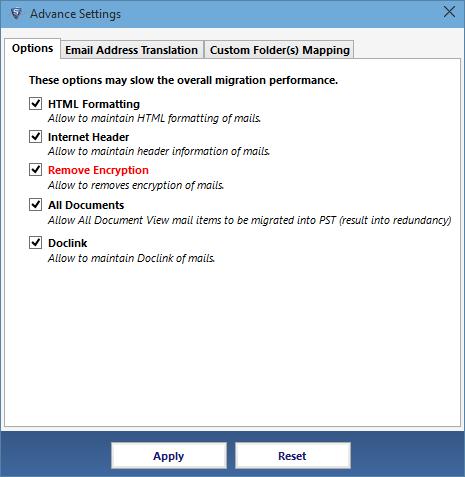
For applying Advance Settings, select the Advance Options.
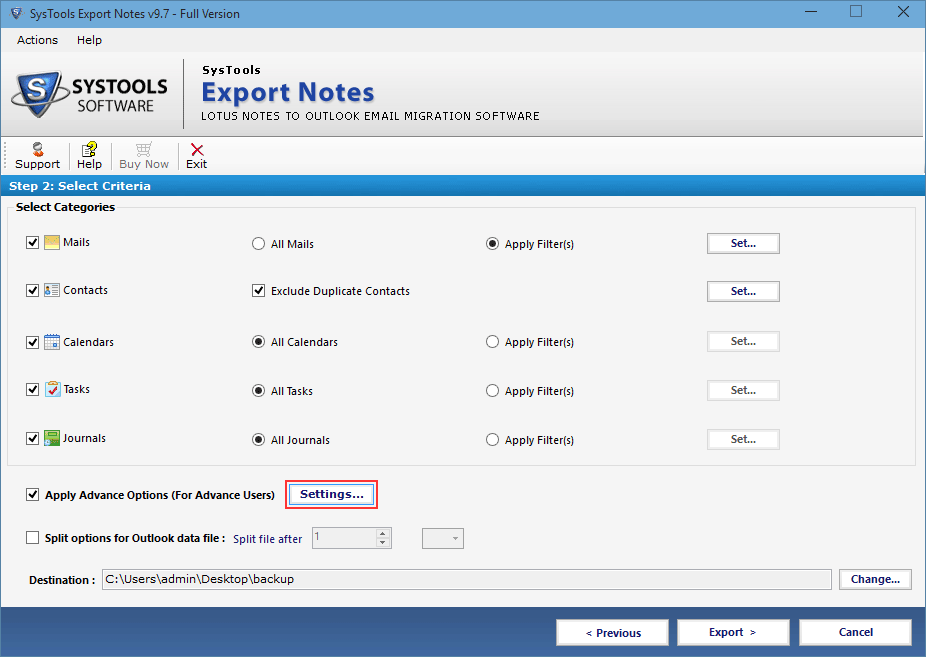
Step 13
In Advance Setings, 5 options are given:
- Selecting HTML Formatting maintains all HTML Formats during the Migration of Mails.
- Selecting Internet Header maintains the header of sent and received mails.
- To remove encryption on mails, select Remove Encryption.
- Selecting All Document allow all mail items documents to be migrated into PST .
- By Selcting Doclinks all doclinks can be maintained.
Step 14
To change Canonical Name which is defined in Lotus Notes, select the naming convention in SMTP Format.
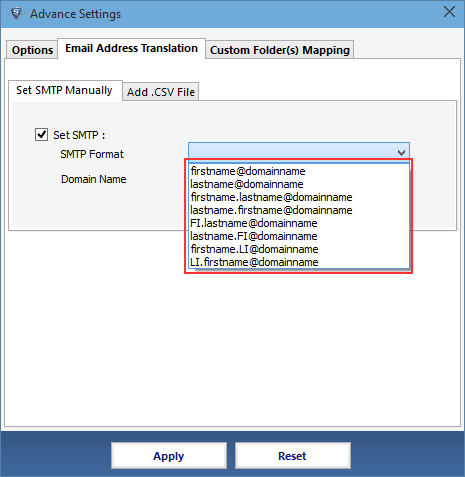
Step 15
Now enter the Domain Name.

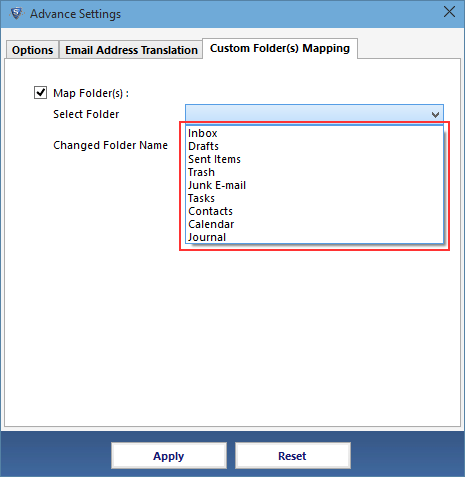
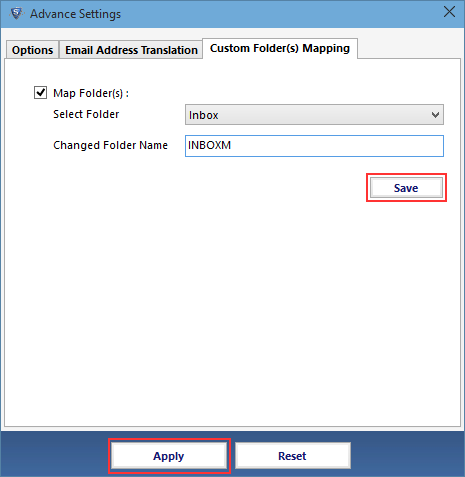
Step 16
Mapping of folder from Lotus Notes to Outlook can be done by selecting Custom Folder(s) Mapping.
Step 17
To save all changes done in Advance Setting. Click on Save button.
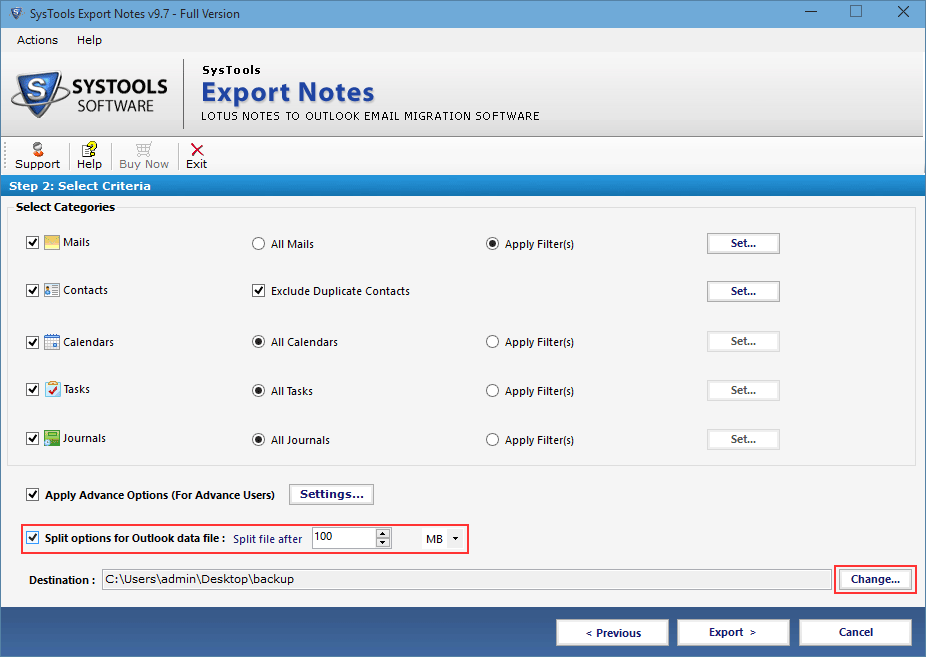
Step 18
Split Option is given to break the large Outlook Data file into smaller ones. Change the Destination location of migrating the files.
Step 19
Click on Export button for migration to take place.

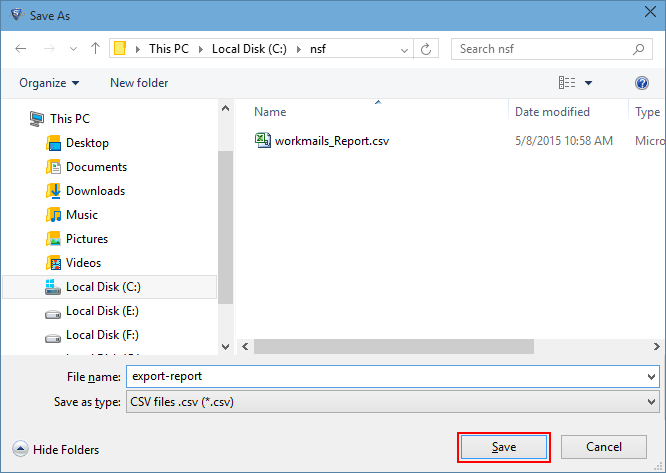
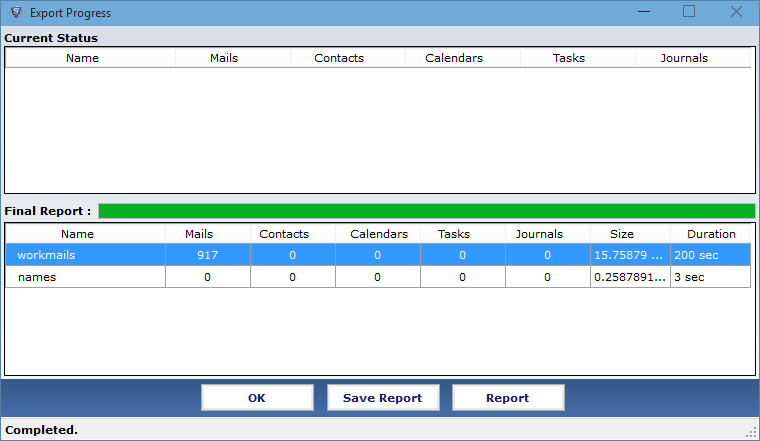
Step 20
An Migration Report will be generated by the tool displaying current status and final report. This Report can be saved into your machine, click on Save Report.
Step 21
Locate the location for saving your report in your machine.