Working steps of the tool to perform migration
Carry out step by step execution by following Helpful Screenshots and be sure about safe Mail Migration
Step 1
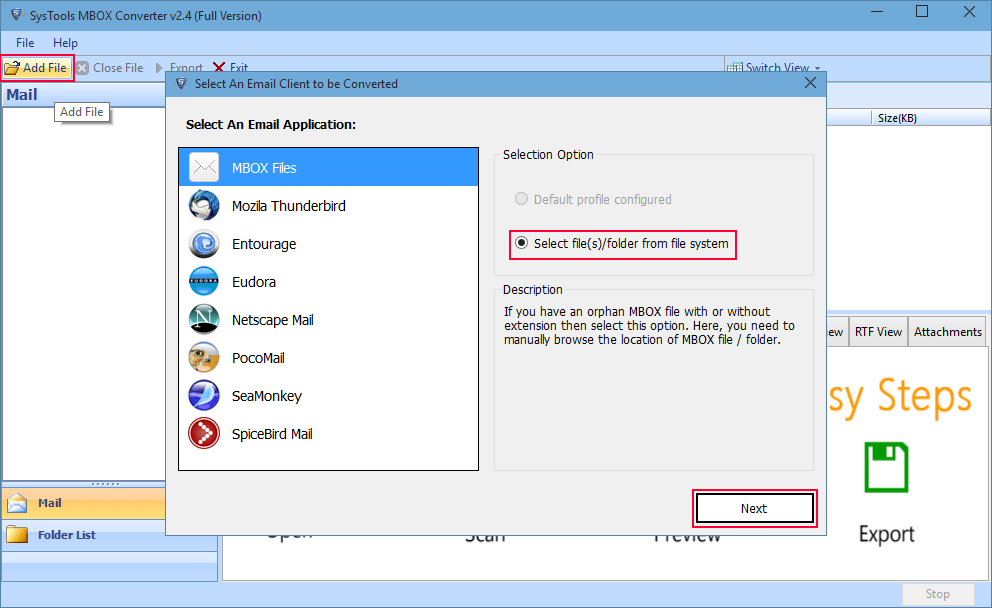
Run the tool. Click on Add file then select the MBOX Files from select file/folder selction option and click on Next
Step 2
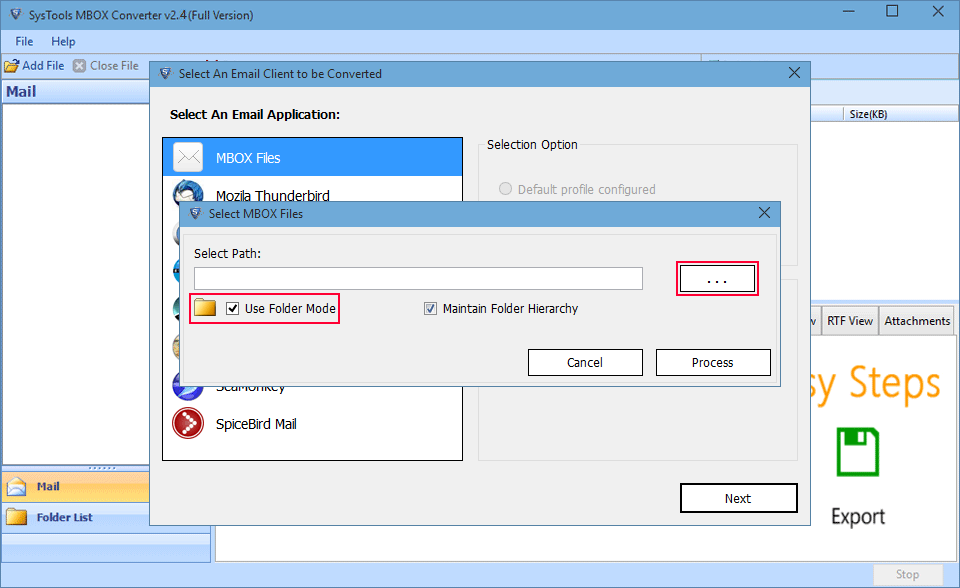
Then browse the mbox files in Folder mode
Step 3
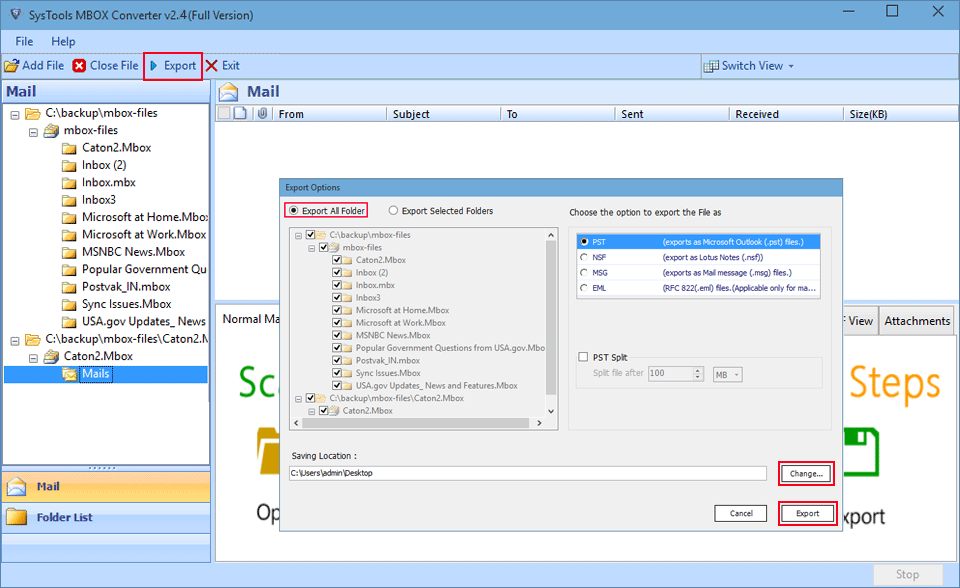
On adding mbox files click on export option and choose the option to export the mbox file and select the folder you want to export and change the saving location and click on Export.
For conversion in Default Profile configured Selection option
Step 3
Select the MBOX supported application installed into your machine. And Click on Next
Step 4
Next screen will show the default fetched location of file and Select Identities and click Process.
Step 5
After processing, the emails of selected mbox will have preview in the next window.
Step 6
This tool provides the multiple views of the emails like Normal view, hex view, properties view, HTML view etc.
Step 7
User can switch the screen view anytime while using the software between horizontal or Vertical mode screen.
Step 8
Click on Export and choose Export option and saving location in your machine.
Step 9
After clicking on Export option, a export progress report will be displayed showing the item count and folder name and user can also stop the process any time.
Step 10
After completing migration process. A pop up window will show a successfully complete export.
Step 11
A window appears to open the saves pst location and to open the tool generated export report.
